Ombre Pink Nails: Embrace Elegance and Grace
In the world of nail art, few designs evoke a sense of timeless elegance and femininity quite like ombre pink nails. This exquisite trend seamlessly blends different shades of pink to create a captivating gradient effect that’s perfect for any occasion. In this article, we’ll explore the enchanting world of ombre pink nails, from color choices to application techniques, allowing you to embrace this graceful and stylish nail art trend.
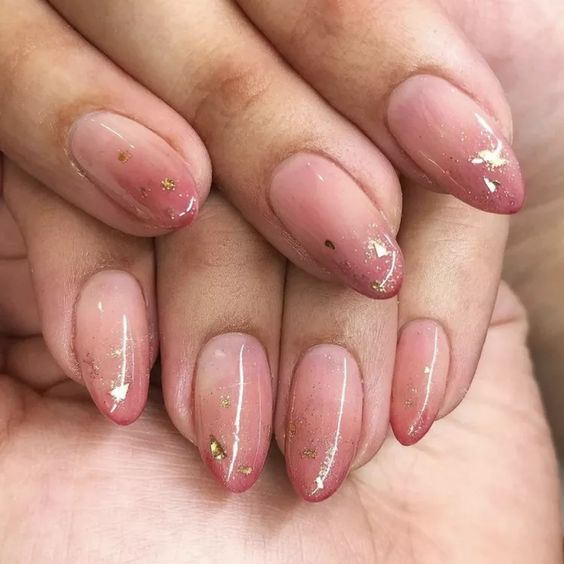
1. Choosing Your Pink Palette:
The beauty of ombre pink nails lies in the diversity of shades you can explore. Consider the following options:
A. Classic Pink Ombre: Start with a soft pastel pink at the base and gradually transition to a deeper shade, creating a subtle and delicate ombre effect.
B. Blushing Roses: Combine pale pink, medium pink, and a touch of rose for a romantic and blush-inspired ombre that’s perfect for weddings and special occasions.
C. Pink and Gold Ombre: Add a touch of glamour to your ombre pink nails by incorporating gold accents. Combine various shades of pink with gold glitter or metallic polishes for a dazzling and luxurious look.
D. Vibrant Pink Gradient: Go bold with vibrant pink shades that make a statement. Transition from neon pink to a hot pink hue for a lively and eye-catching ombre design.
2. Ombre Techniques:
Achieving a flawless ombre effect requires a bit of practice, but the results are well worth the effort. Here’s a basic technique to get you started:
A. Gather Your Supplies: You’ll need your chosen pink nail polishes, a makeup sponge, a piece of paper or foil, and a top coat.

B. Paint the Base: Start with a clear base coat to protect your nails. Once dry, apply the lightest pink shade as your base color.
C. Create the Gradient: Pour a small amount of your lightest pink and your darkest pink polish onto the paper or foil. Use a makeup sponge to dab both colors side by side, creating a gradient on the sponge.
D. Sponge Application: Gently press the sponge onto your nail, moving it up and down to blend the colors. Repeat this process until you achieve the desired ombre effect. You may need to apply additional layers for a smoother transition.
E. Clean-Up: Clean any excess polish from your cuticles and skin using a nail brush or cotton swab dipped in nail polish remover.
F. Seal the Deal: Once your ombre is complete and dry, finish with a clear top coat to protect the design and give it a glossy finish.
3. Maintaining Your Ombre Pink Nails:
To keep your ombre pink nails looking their best, maintain proper nail care. Regularly moisturize your cuticles and nails, and reapply a top coat every few days to extend the life of your nail art.
Ombre pink nails are a classic and graceful choice that never goes out of style. Whether you opt for a subtle gradient or a bold and vibrant ombre, this nail art trend allows you to embrace the beauty and charm of pink in a unique and eye-catching way. So, why wait? Embrace the elegance of ombre pink nails and let your fingertips radiate grace and sophistication with every gesture.